This is a chapter from “Delphi in all its glory” book.

Preparing for cross-platform
An SDK is required for the following platforms:
- Multi-device applications for the iOS Device – 64-bit platform.
- Multi-device applications for the Android platform.
- Multi-device applications for the Linux platform.
If you haven’t chouse to install them during Delphi setup, you need to install them manually now. Note that you need to install also, Eclipse Temurin OpenJDK 11 as explained in the “Java not found” section.

SDKs
A software development kit (SDK) is a set of tools required to build your applications for a target platform. If we oversimplify, we can say that the SDKs are a bunch of DLLs. They are located in the CatalogRepository folder:
C:\Users\Public\Documents\Embarcadero\Studio\2x.0\CatalogRepository\
SDK vs NDK
Android SDK (Software Development Kit):
The SDK is a collection of tools, libraries, and documentation that developers use to build Android applications.
It includes tools like adb (Android Debug Bridge), aapt (Android Asset Packaging Tool), and the Android Platform libraries.
The SDK is essential for writing, building, debugging, and deploying Java/Kotlin-based Android apps.
Android NDK (Native Development Kit):
The NDK is a set of tools that allows developers to implement parts of their app in native code using C or C++. It provides access to low-level APIs, including OpenGL for graphics and native libraries for performance-critical components.
The NDK is optional and used primarily for scenarios where performance optimization is critical or when integrating existing C/C++ libraries into the app.
In Delphi, the SDK is mandatory for all Android apps, while the NDK is required only for specific tasks, such as targeting 64-bit Android apps or using native libraries.
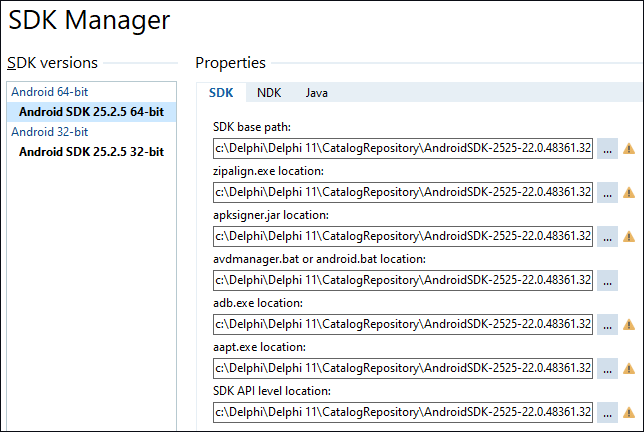
The SDK Manager
The SDK Manager lets you setup your SDKs and can be accessed via Tools > Options > Deployment > SDK Manager:
These paths are saved in .SDK files in your AppData folder. Example:
c:\Users\Gabriel\AppData\Roaming\Embarcadero\BDS\22.0\AndroidSDK25_32bit.sdk
c:\Users\Gabriel\AppData\Roaming\Embarcadero\BDS\22.0\AndroidSDK25_64bit.sdk
The documentation pretends that there are more files in this folder but I can’t find anything there:
c:\Users\Gabriel\Documents\Embarcadero\Studio\SDKs
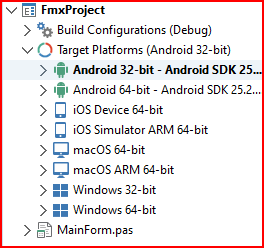
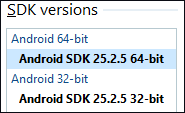
Default SDK
There could be multiple SDKs for a platform. The default SDK appears in bold type. The Windows platforms do not have a default SDK.
The SDK Manager page provides:
For macOS & iOS SDKs:
- A list of absolute paths to files and folders on the Mac that are required to build applications for the SDK target platform.
- A copy of those files, which can be pulled from the Mac using a connection profile.
For Android:
- The paths to the required software in your system.
Setting up the Android platform
To develop Android applications using Delphi you need the following third-party development tools for Android development using RAD Studio:
- JDK
- Android SDK
- Android NDK
The process is streamlined in Delphi through the RAD Studio IDE, which automatically configures most settings during installation.
Steps to install the Android Development Tools
- Install RAD Studio: Ensure you select the Android platform during the installation process.
- Android SDK and NDK: RAD Studio can automatically install the Android SDK and a compatible NDK version during setup.
- Java JDK: A compatible version of the Java JDK (Oracle or OpenJDK) is required. RAD Studio provides recommendations for the JDK version to ensure compatibility. The JDK path can be specified/changed in the SDK Manager.
- Platform Tools: Verify that required tools, such as ADB (Android Debug Bridge), are functional. These tools come pre-installed with the Android SDK.
- Set Up a Device or Emulator:
- For testing, configure a physical Android device with USB debugging enabled or use an Android Emulator.
- Add the device/emulator in Tools > Options > Devices.
Common issues and solutions
 Ensure all paths, including the Android SDK, NDK, and JDK, are correctly set in the RAD Studio options. Invalid paths are marked with a yellow triangle.
- Use a supported version of the Android platform. Newer versions may require updating RAD Studio or the installed SDK.
- For 64-bit Android development, verify that you are using the required NDK version.
Java not found
When trying to compile for Android you might see Delphi complaining that it cannot find Java.exe:
[PAClient Error] Error: E7684 Could not find program, ‘C:\bin\java.exe’
To fix this, you need to install the Android SDK (first tab) and Eclipse Temurin OpenJDK (the second tab, “Additional options”). You do this from the Tools -> Manage Platforms main menu:
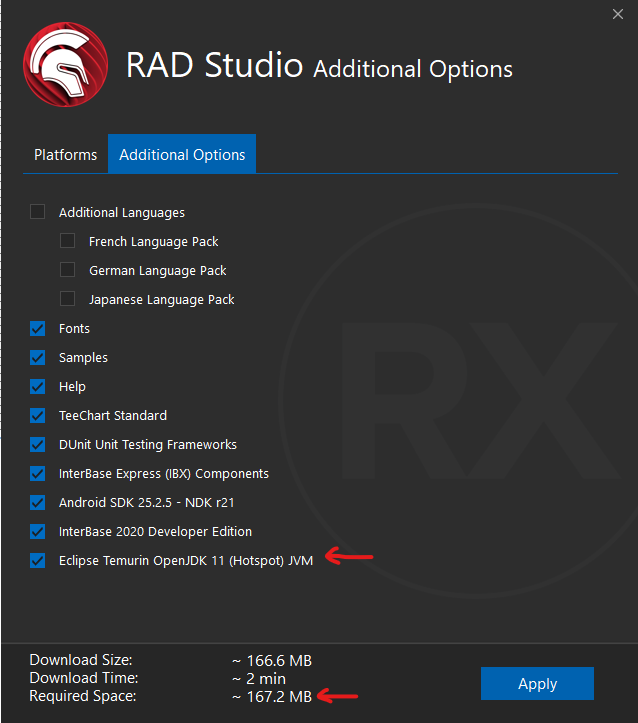
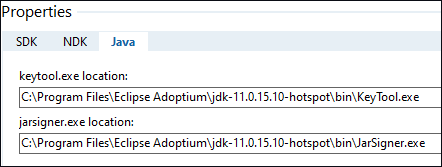
This will install Eclipse in:
c:\Program Files\Eclipse Adoptium\jdk-11.0.15.10-hotspot\bin\
Now the Java section looks like this and you should be able to successfully compile for Android:
Java_Home
Run this command and check its answer:

If the command says that Java is undefined or not found, you need to set the JAVA_HOME paths as shown below:
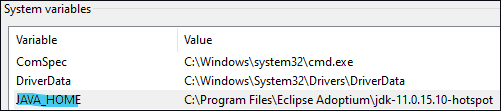
You can also set an environment variable with the setx command:
setx /m JAVA_HOME “C:\Program Files\Java\jdk”
Note that JAVA_HOME should point to a JDK not a JRE.
Manually install the SDK
I have found that my Delphi 11 did not install the SDK properly. Other people reported the same for Delphi 12. I have found that running these commands will reinstall the SDK:
sdkmanager.bat –update
sdkmanager.bat –install “platforms;android-3x”
sdkmanager.bat –install “build-tools;3x.0.0”
The “3x” refers to Android API level. “33” corresponds to Android 13 and it is officially supported on Delphi 12. Delphi 11.3 does not offer the support for API level 33, so use 32 or 31.
For your commodity I created a script “Update_SDK.cmd” that fixes all the above problems. The script is available at: GitHub.com/GabrielOnDelphi/Delphi-in-all-its-glory-Demo-Code
prompt $g
echo off
cls
echo JAVA_HOME:
echo %JAVA_HOME%
java -version
echo.
echo LIST
call sdkmanager.bat –list
echo.
echo UPDATE
call sdkmanager.bat –update
echo.
echo INSTALL PLATFORMS
call sdkmanager.bat –install “platforms;android-32”
echo.
etc…
After applying my “fix it all” tool, all exclamations signs are gone. We can finally build our first FMX Android application:

Step-by-step guide
https://docwiki.embarcadero.com/RADStudio/Athens/en/Installing_the_Android_Development_Tools
Connect your Android phone to your computer
Enable Developer options
On Android 4.1 and lower, the Developer options screen is available by default. On Android 4.2 and higher, you must enable this screen:
- On your device, find the Build number option. Usually, it is located under Settings > About.
- Tap the Build Number option seven times until you see the message You are now a developer! This enables developer options on your device.
- Return to the previous screen to find Developer options at the bottom.
Enable USB debugging on your device
You need to enable USB debugging, which allows the SDK tools to recognize your device when connected via USB.
Enable USB debugging in the device system settings under Developer options, depending on your Android version:
- Android 9+: Settings > System > Advanced > Developer Options > USB debugging
- Android 8: Settings > System > Developer Options > USB debugging
- Android 7: Settings > Developer Options > USB debugging
Details about how to activate more debugging & developer-mode settings here: developer.Android.com/studio/debug/dev-options#enable
Targeting Android 32-bit vs Android 64-bit
Android 32-bit (ARMv7)
- Widely supported on older devices.
- Some older Android devices only support 32-bit architecture.
- Apps built for ARMv7 run on most devices but may lack the performance optimizations of the 64-bit architecture.
Android 64-bit (ARM64)
- Mandatory for publishing new apps or updates to the Google Play Store since August 2019.
- Offers better performance and memory usage, especially for apps with high computational demands.
- Future-proof for modern and upcoming Android devices.
Recommendation
If you’re building a new app or updating an existing one, you should target Android 64-bit (ARM64) to meet Google Play Store requirements. You may want to include a 32-bit build only if you want broader device compatibility. RAD Studio supports both architectures, allowing you to distribute a multi-architecture APK or App Bundle. Personally, I don’t bother with ARM7. People with devices that old are rare.